So you just got your AncestryDNA kit in the mail – exciting! I know you’re eager to unlock the secrets hiding in your DNA. Before you begin, let’s walk through how to properly activate your kit so you can get the most accurate results.
Creating an Ancestry Account via ancestrydna.con/activate
The first step is making sure you have an Ancestry account tied to your DNA kit.
- If you don’t have an account yet, create one for free on Ancestry’s website. All you need is an email address.
- You can only activate one DNA kit per Ancestry account, except for tests done for minor children.
Tip: If the email you want to use is tied to another Ancestry account, simply create a new email address first.
Once your account is good to go, you’re ready to activate your kit!
Activating Your DNA Kit Step-by-Step
Activating your kit ensures your DNA results get tied to the correct Ancestry account. Follow these simple steps:
-
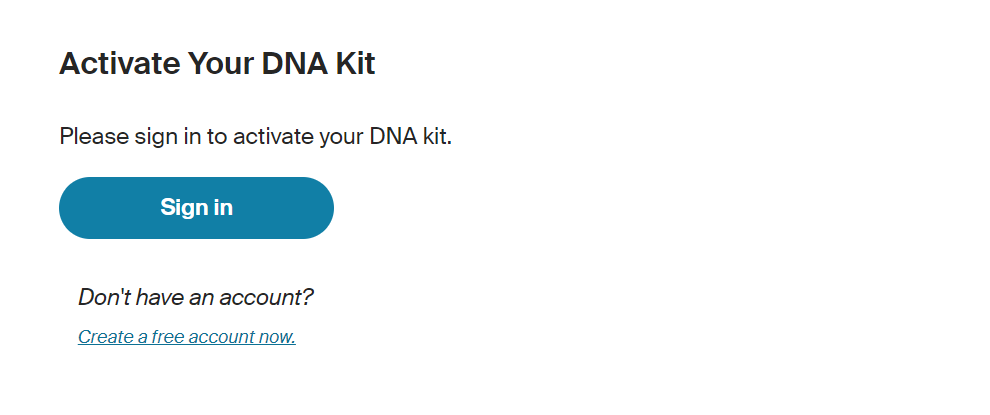
Go to ancestrydna.com/activate and click “Sign In.”
-
Enter your Ancestry account login credentials and click “Yes” to confirm you’re logged into the correct account.
- If you log into the wrong account, select “No” and sign in again with the right account.
-
Locate the 15-digit activation code on your collection tube and enter it when prompted. Then click “Next.” This links your kit to your account!
-
Select who the DNA kit belongs to:
- Yourself
- Your minor child
- Another adult
Then fill in the requested information like birth year and gender.
-
Review and agree to the DNA Processing Consent. Make sure to read this part carefully!
-
Decide if you want Ancestry to store your DNA sample or not.
-
Opt into or out of participation in AncestryDNA research.
-
Choose whether to be listed as a DNA match and view matches.
-
Pick display name and ethnicity sharing preferences for DNA matches.
-
Enter mobile number if you want text updates on your kit status.
-
Select whether you want weekly relative matching emails or not.
-
Double check all your info and then click “Submit and activate.”
And that’s it! Your kit is now activated and ready to use. You can check the status anytime under the DNA tab in your Ancestry account. Time to take your cheek swab and send in your sample!
I hope this guide helped explain the activation process. Activating that kit is an important first step to delving into your unique genealogy. Let me know if you have any other questions!